Recreating the Eames Musical Tower
Recreating the Eames Musical Tower
Inspiration
During a recent visit to an exhibition of work by Charles and Ray Eames, in a quiet corner of the gallery, I was surprised by a piece of modern design I'd never heard of before. A narrow perspex and wooden tower, almost the entire height of the gallery, with intriguing brightly-coloured bars in slots here and there down the entire column. Whilst I was trying to work out the purpose of this object, there was a clicking noise from near the ceiling of the gallery, followed by a series of clear, ringing notes. Turns out one of the gallery staff had just dropped a marble into the top of the tower, and as it fell down, it was striking each of the metal bars in turn, creating a chiming melody. To control the timing, some of the slots had wooden bars inserted instead of chimes, to allow different note lengths and rests.
Charles and Ray Eames designed their 'Musical Tower' in the 1950s. They originally had it installed in their studio, and staff and visitors would be invited to rearrange the notes to produce new melodies. However, given the tower is around four and a half metres (or fifteen feet) high, I'm assuming it didn't happen very often, or they had a good ladder. One of the towers is now permanently housed at the Eames House, in Pacific Palisades near Santa Monica. The replica installed at the exhibition had been configured to play a long, rambling melody specially composed by Elmer Bernstein in 1965.
Once I had taken a closer look the details of the construction became clear and I thought to myself "OK - I could build that...". I even said as much to the people I was at the exhibition with. And then as often happens, you go home and move on with other projects. And that would have been that if it hadn't been for a trip to a local charity shop a few days later where I spotted a child's toy glockenspiel sitting unloved at the back of a shelf. Suddenly the Eames musical tower and its brightly coloured metal chime bars resurfaced in my mind and a plan began to form...
Prototyping
After scouring the internet for images of the original, I started prototyping the design of the wooden sides, which would support the various bars. To quickly work through some different spacings and angles, I began by drawing short scale sections as vectors, which I then printed and cut out of corrugated cardboard, using slotted card strips to hold the two verticals together.
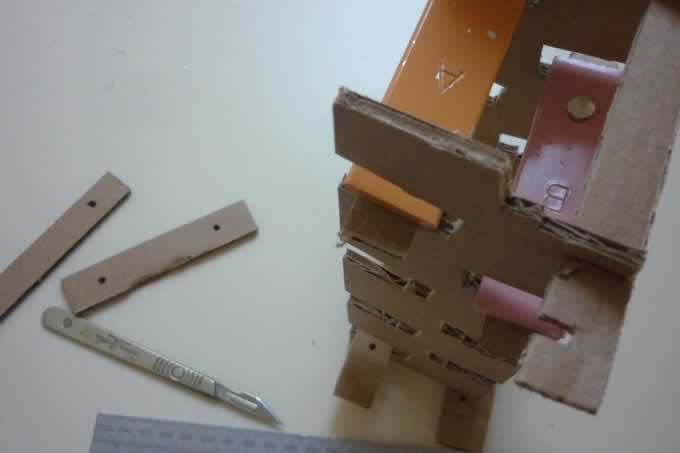
Once I had the basic layout nailed down, I started looking into how I would fabricate the complex side pieces. My choice of material initially was pine timber, since that was what had been used in the original. The angles needed to be consistent and I planned to make the design modular, so that a tower of any height could be constructed by bolting on new side pieces. So my first thought was some form of computer controlled cutting. I looked into laser cutting plywood, but the cutting time for 10mm plywood was pretty high, and so would have cost around £80. This was more than I wanted to spend for my first working model, so I looked into CNC cutting the pieces. This was more reasonable, but I found myself wanting to be as hands-on as possible with this project. So I worked out a process to cut the sides myself.
Fabrication
Using the same vector layout I had created for the prototype, I used some scrap aluminium sheet and a piece of spare timber to make up a cutting jig.
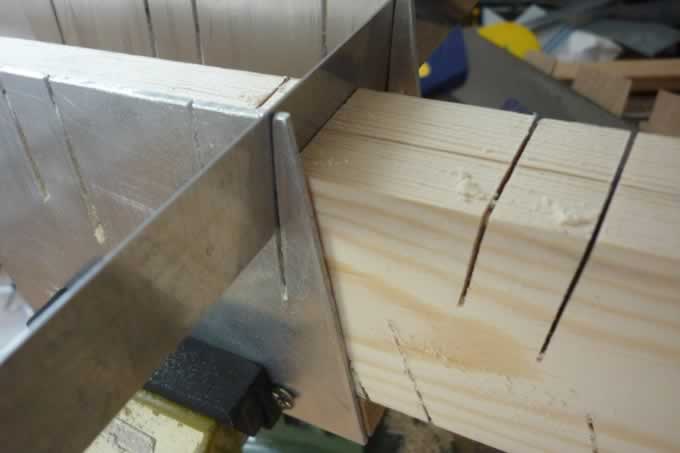
The original tower has thin sides, perhaps 10mm thick, but I was concerned that removing so much material would make the remaining wood too fragile and flexible, so I plumped for a more robust 15mm. I found a piece of straight pine at my local timber merchants, which I planed to thickness and then cut into two lengths of around 1600mm each. Once these were carefully aligned and taped firmly together with masking tape, they were placed in the jig and I started to cut.
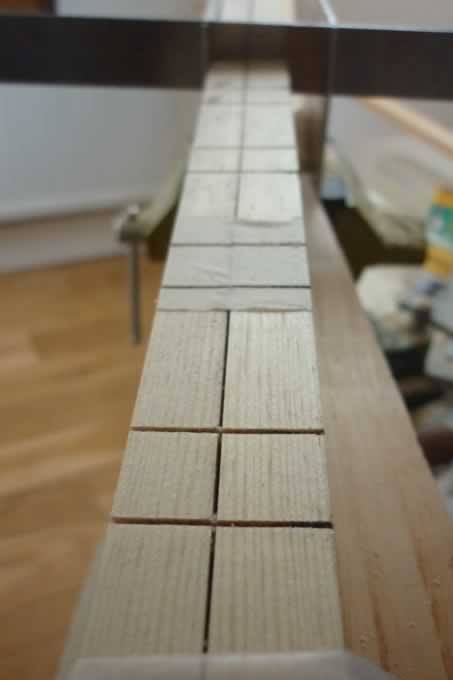
After all the slots were cut, the waste material was chiselled out to create the gaps for the musical bars. This took a long time as I wanted the finished piece of wood to look as tidy as possible. I used a small wooden jig whilst making the final adjustments to the depth of each slot, so that they were completely consistent.
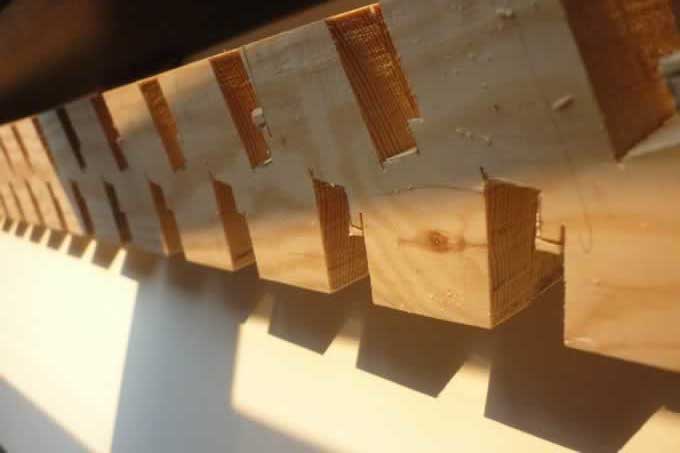
Once the sides had been sanded, I test-fitted the two sides togethers, using scrap wood as braces, to try out a few bars in place, and to work out the ideal width to use. The sides were scarily flexible, but once sat on end, they were very true and stable enough to determine the dimensions for the front and back plates. The original appeared to use perspex a.k.a. acrylic sheet, both for the tower and for the horizontal supports for the chimes themselves. So armed with my dimensions, I ordered some 4mm clear acrylic cut to size for the front and back, and an additional single strip that I could make the chime supports from. Amazingly, such narrow strips survived postage perfectly well, and as acrylic is extremely easy to work, I was able to drill, countersink and screw the perspex panels to the wooden sides in a couple of hours. Once temporarily secured, the wooden sides became extremely stiff and the whole construction was perfectly true, standing upright completely unsupported. I used self-adhesive neoprene strip to insulate the acrylic and wooden pieces, which helps to give the final design a very clean neat look.
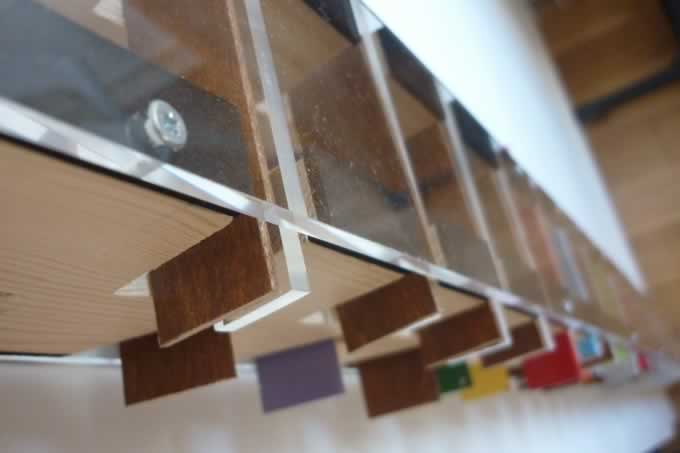
With the tower completed, I turned my attention to the chime bars. In order to produce any kind of complex melody, I would need more than the eight notes provided by the toy glockenspiel. After a bit of research, I found some useful information online about the physics of glockenspiel bars, so I ordered a length of aluminium bar that matched the dimensions of the chimes from the toy. After multiple rounds of cutting, drilling and filing, and with the help of a guitar tuning app, I was able to produce a perfectly tuned C note chime bar.
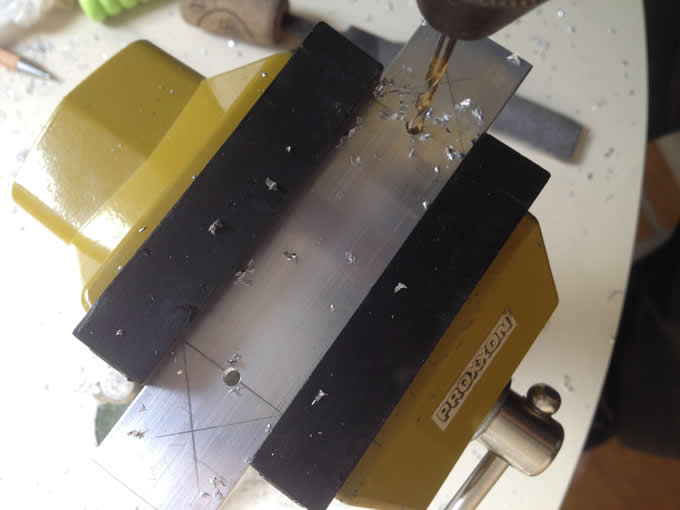
Using some maths I could then work out the appropriate length of bar to create any other note I needed. Subsequent bars could be made much faster as there was far less trial and error - just a final honing to adjust the pitch precisely.
Conclusion
I am very pleased with the final object. It is a stylish, intriguing piece of modern furniture that brings a smile to the face of everyone who sees it. If I were to do this again, I think I would look into CNC cutting the sides, to save time. The homemade chimes are a complete success and I intend to spray paint them at some point, to help identify each note and to enhance the look of the tower when in situ.
